The Special Events feature on the SledNH Map App allows clubs to highlight upcoming events on the map. This feature is only available on the phone version of the map app. It is not available on the web version.
Depending on the scenario, either a Event Star and/or a Highlighted Trail can be used to promote the event.
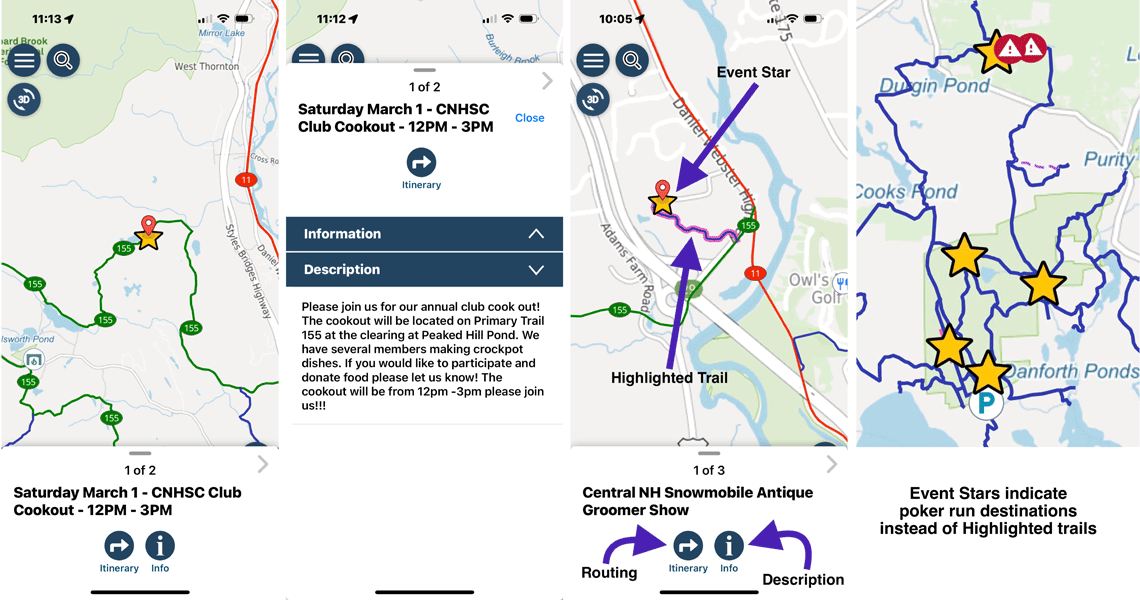
Special Event Stars
The Event Star serves as the POI (Point Of Interest). It draws attention to your club event on the map.
When a rider taps the Star, it activates a pop-up with information about your event. When tapping the Info icon at the bottom, an Information and Description bar appears. Tapping the Description bar displays details.
Highlighted Trails
The Highlighted Trail displays a trail or path to the event.
Example 1: If your club event is off a Corridor/Primary/Club trail, a Highlighted Trail will guide riders to the event area.
Example 2: A Highlighted Trail during an event, such as a Poker Run, would indicate specific trails that are stopping points. Although a poker run could use Stars to indicate the card pick-up points and let the user decide how to get there.
Submitting Event Route with Stars and Highlights
A great feature of the SledNH Map app is the ability to route and share that route. The map committee will use that route to accurately promote your Event. This is the preferred method.
Displaying Highlights: Check Display Highlighted Trails when submitting the form.
Display Stars: Check Display Event Stars when submitting the form.
Select both if needed.
Note, Stars can be based on the marker points (A, B, C,D,E…) you create when building a route. A poker run can have stars but no trail highlights, letting the rider choose which trail to ride (see photo at top right). You will have the ability to indicate which letters on the route are Stars (A, B, E). Maybe you only need a single Star to mark the event location and access trail. Let us know.
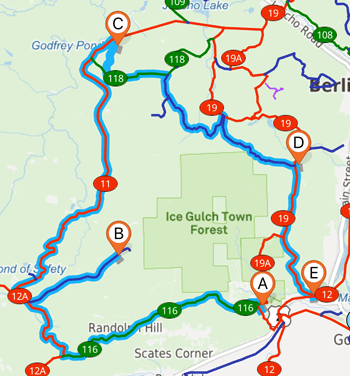
Create Event Route
- To create a route, tap the curved arrow icon at the lower right corner
- Tap Create New Route
- Create a start point by tapping the map at the desired locations to set marker A
- Tap a second point for marker B
- Add more markers by tapping Add a Destination at the top of the screen until you finish the route
- To re-ordered points, tap and hold a three line icon at the top right and drag
- Tap the Save button and give it a name.
Sharing Event Route with Map Committee
- Tap the Share icon under the Save or Update button to see sharing options
- Don’t see the Share icon? Tap the curved arrow icon and select the saved route
- Copy the link and paste it into the Event submission form.
Screenshot Option
Although not as accurate, and often hard to translate, you can upload a screenshot of a route.
You must be logged in to post a comment.